AppliedOnline Sales Demo Installation Instructions
Product: AppliedOnline Demo Reservations
This procedure is for customers who have authorized access to Applied
System’s AppliedOnline (TAMOnline or VisionOnline) for sales demonstrations.
Software referenced in this procedure is supplied to those
customers who have been granted access. This document explains the standard
configuration procedure for connecting to AppliedOnline.
To access AppliedOnline on any workstation, you must install three
separate programs: the Microsoft Remote Desktop Connection client,
the triCerat Screwdrivers Printing client, and the Virtual Channel
client.
For your convenience, all three programs come
in a single installation that you can obtain from the
AppliedOnline Client Downloads section of our website.
- Access the
AppliedOnline Client Downloads webpage.
- Click the
appropriate link for the site you need to download.
Note: The following example has
screen shots from the US Demo TAM download. The other sites will have
similar images, but may have slightly different text.
- Your system prompts, "Do you want to run or save this file?" Select
either Run or Open, depending on the
options presented. Your system may also prompt you with an Internet Explorer Security
Warning or certificates. Select Run or Yes
to continue if this prompt displays.
Note: Windows Vista users
should save this file to their desktop, then right click the saved file and
select Run as Administrator.
- The Welcome to the AppliedOnline Install Setup Wizard screen
displays. Click Next.
- Click Next to continue with the installation.
- On the Ready to install screen, you have options to install
the three components needed for AppliedOnline.
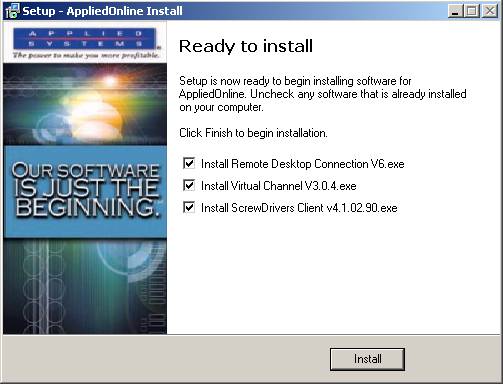
Leave all three options selected and click Install if you would like to demo the
ScrewDrivers Client and Virtual Channel.
If you are not going to demo the ScrewDrivers Client or
Virtual Channel, deselect the components
that you do not need and click Install. Refer to
Steps
7-9 for
Remote Desktop Connection,
Steps
10-14 for
Virtual Channel, and
Steps
15-19 for the
ScrewDrivers Client.
- You may see an update for Windows XP. If so, click Next.
- Carefully read the License Agreement. Click Print to
print it. Your must accept the agreement to install the Microsoft Remote
Desktop Connection client. If you accept the agreement, select I
agree and click Next. If you select I do not agree,
the installation will not continue.
- Click Finish.
- On
the Welcome to the Install Shield Wizard for VChannelClient screen,
click Next.
- Carefully read the License Agreement. Click Print to
print it. You must accept the agreement to install the Virtual Channel
Client. If you accept the agreement, select I accept the terms of
the license agreement and click Next. If you select I do not accept the terms of the license agreement, the installation
will not continue.
- Enter your User Name and Company Name;
click Next.
- Click Install.
- Click Finish.
Note: You may be prompted to
restart your computer. You can wait until everything has installed and then
restart your computer. (Step 21 states to restart your computer)
- On the Welcome to ScrewDrivers Client v4 screen, click Next.
- Deselect Citrix ICA Client Support and click
Next.
- At the ReadMe File screen Click Next.
- At the Start Installation screen Click Next.
- After the install has completed Click Finish.
- Restart your computer.
- If the workstation has multiple printers installed, use the following
procedure to specify the printers available in the AppliedOnline client
session.
- Click Start, (Settings), Control
Panel.
- Double click ScrewDrivers Client v4.
- Once the ScrewDrivers Client v4 opens, there should be an
option for Spoof the Default Printer on the General tab.
Make sure this is not selected.
- Click the Printers tab. Move your preferred printer(s)
under the Preferred Printers box. Move any printers you do not need
in AppliedOnline to the Denied Printers box. The server automatically
creates the Preferred Printers and Available Printers, up to a
limit of five.
- Click OK.
- Double click the TAMOnline or VisionOnline
icon on your desktop to enter AppliedOnline. Enter your user name and
password to log in.
Last Revised:
May 13, 2009 01:30 PM